Today we try to create spring mvc project at intelliJ framework,
we don't have to make it long, Let's do it right away!


Click
Check -> OK
Downloading Spring MVC
Project Structure

Change
*.form -> /
(바꾸라는 소리)

Save
(저장)

Click
(클릭)
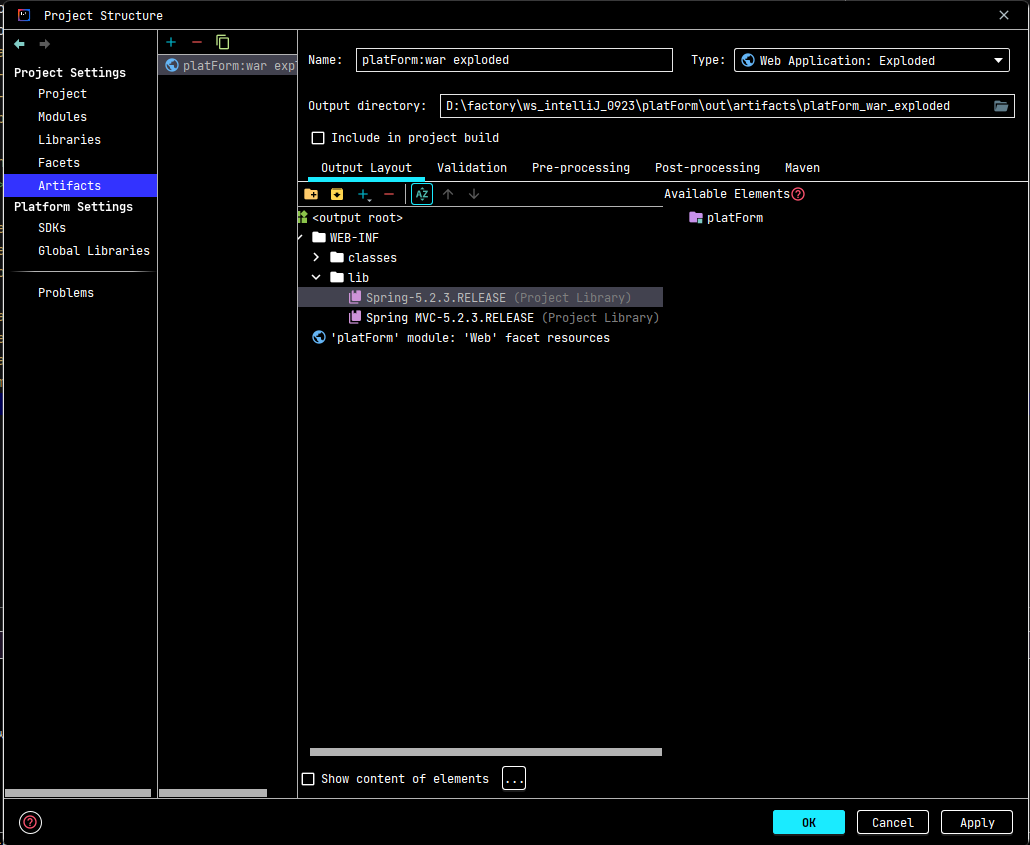
Spring-5.2.3 And Spring MVC files nee to be moved on left side as like as picture
( 사진처럼 Spring-5.2.3 Release 저거 두개를 왼쪽으로 옯겨주세요 )
<?xml version="1.0" encoding="UTF-8"?>
<beans xmlns="http://www.springframework.org/schema/beans"
       xmlns:xsi="http://www.w3.org/2001/XMLSchema-instance"
       xmlns:context="http://www.springframework.org/schema/context"
       xmlns:mvc="http://www.springframework.org/schema/mvc"
       xsi:schemaLocation="http://www.springframework.org/schema/beans http://www.springframework.org/schema/beans/spring-beans.xsd
        http://www.springframework.org/schema/context http://www.springframework.org/schema/context/spring-context-4.0.xsd
        http://www.springframework.org/schema/mvc http://www.springframework.org/schema/mvc/spring-mvc-4.0.xsd">

    <mvc:annotation-driven></mvc:annotation-driven> <!-- Annotation 활성화 -->
    <context:component-scan base-package="Controller"></context:component-scan> <!-- Component 패키지 지정 -->

    <bean class="org.springframework.web.servlet.view.InternalResourceViewResolver">
        <property name="prefix" value="/WEB-INF/views/"></property>
        <property name="suffix" value=".jsp"></property>
    </bean>

</beans>
Copy
(이거 복사 해서 사진 처럼 넣어줘야 됩니다.)
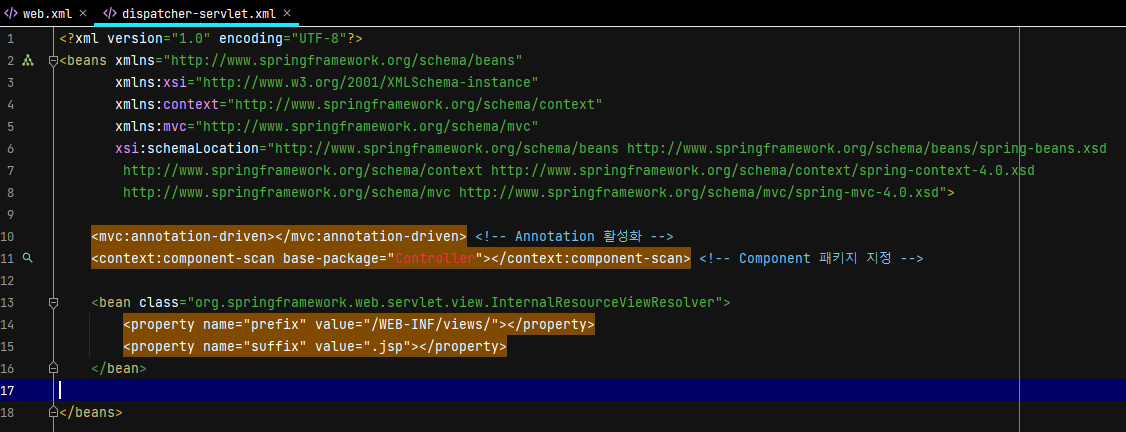
Change the dispaatcher-servlet.xml contents to this

web -> WEB-INF -> views
( 다음 처럼 폴더 생성 해주세요.)
Create directroy like this path as you can see

Create views directory
( 뷰 폴더 생성해주세요. )

And Index.jsp move from WEB-INF to views directory
( index.jsp 파일을 WEB-INF 에서 뷰 폴더 안으로 이동 )

You can see views directory in index.jsp
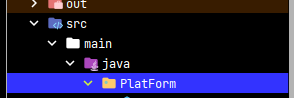
Create a package
(이름은 마음대로 패키지 파일 생성)

And Create Controller.java file.
( 서버단 만들기 위한 Controller 자바 파일 생성 이름은 본인 편한대로 해주세요. )
package PlatForm;

import org.springframework.stereotype.Controller;
import org.springframework.web.bind.annotation.RequestMapping;

@Controller
public class PlatFormController {

    @RequestMapping(value = "/")
    public String test(){
        return "index";
    }
}
Copy this code and paste on your controller.java file And By clicking F2 import @Controller.
( 이걸 복사 하여서 Package 이름은 본인이 만든대로 바꿔주고, F2 눌러서 @Controller import 해주세요. )

Fill file with copycode.

Edit Configurations... There is the upper right
( Edit Configuration 클릭 오른쪽 상단에 있음.)
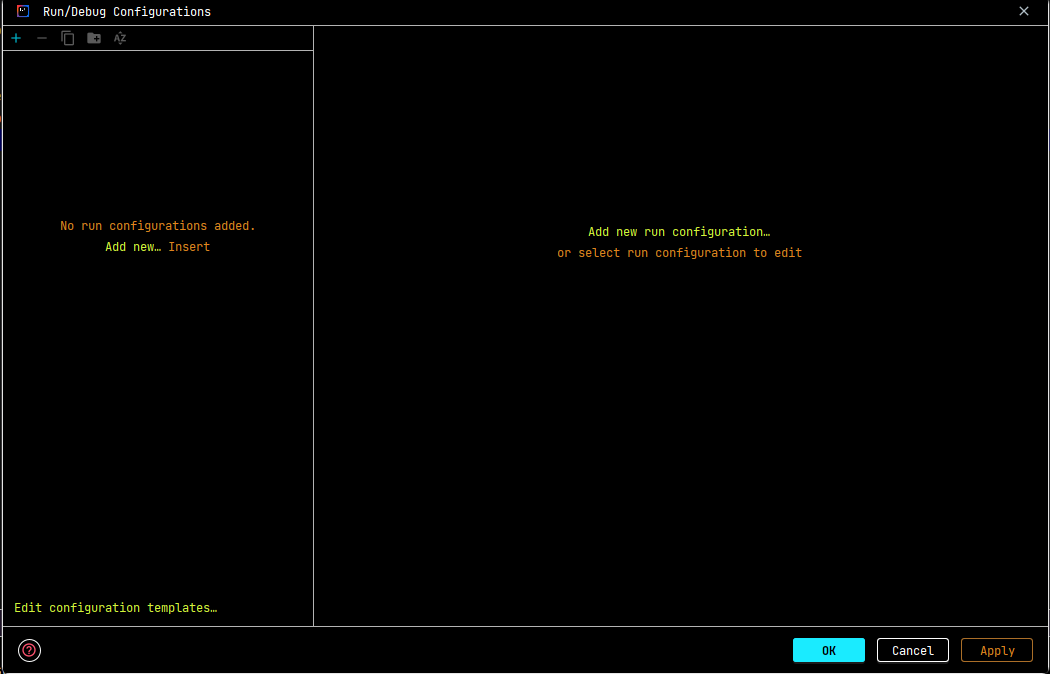
click Add New...
(Add New 클릭)

check a local
( local 클릭 )
tomcat setting
(톰캣 세팅 할 것임)
If you don't have tomcat file
https://tomcat.apache.org/download-80.cgi
Apache Tomcat® - Apache Tomcat 8 Software Downloads
Welcome to the Apache Tomcat® 8.x software download page. This page provides download links for obtaining the latest versions of Tomcat 8.x software, as well as links to the archives of older releases. Unsure which version you need? Specification versions
tomcat.apache.org
You can take a tomcat file this website.
Tomcat version between 8 ~ 9 is stable than the others.
( 톰캣 파일 없으면 위에 사이트 놀러가서 8~9 버전 다운 받아서 사용하세요. 그게 제일 안정적인 버전임)

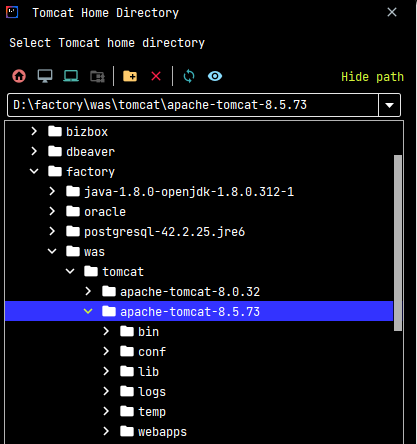
And OK
( 톰캣 파일 경로에 맞게 잘 세팅)
잘 적어 놨으니 보고 하세요.

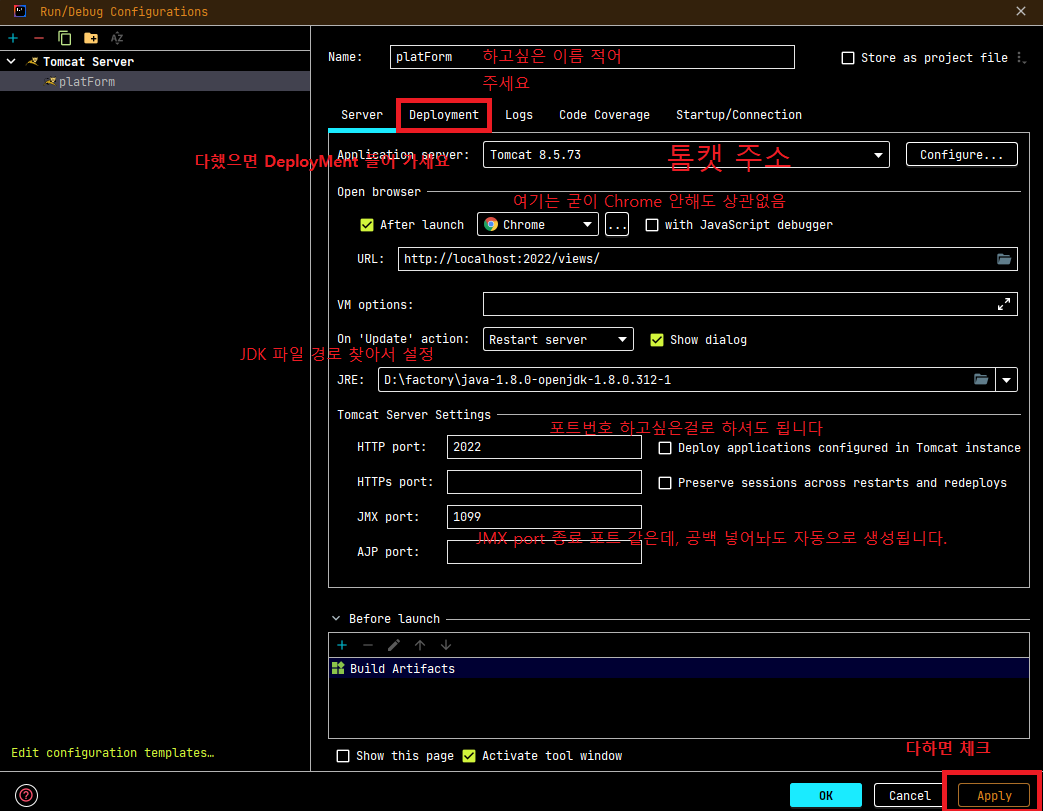
Set like this And Apply
( 사진 보고 세팅하세요 그리고 Ok 누르고 Apply)

Turn on the server.
(서버 키고)

This is server structure.
( 톰캣 서버 구조임 )

아주 페이지가 잘뜸
(It's going well than I thought)
End
(끝)

To be continue..
'Framework > IntelliJ' 카테고리의 다른 글
| [IntelliJ] 인텔리제이 SVN Repository 꺼내기 (0) | 2023.01.02 |
|---|---|
| [IntelliJ] 인텔리제이 코드 수정 내역 확인하는 방법 (0) | 2022.11.30 |
| [IntelliJ] 인텔리제이 새로운 파일 SVN에 추가 하는 방법 (0) | 2022.11.07 |
| [IntelliJ] 인텔리제이 SVN 내려받은 파일 되돌리는 방법 (0) | 2022.10.28 |
| [IntelliJ] 인텔리제이 yarn 세팅 및 설치 후 작동 안되는 에러 해결방법 (0) | 2022.09.23 |


